
I have been looking for a way to create static websites recently, something that could be used to create a portfolio website. Creating your own website might be a bit of a tedious task and there is always a need to use something that has the right amount of balance between pre-built components and configurability. This gives you control over your website while also helping you build it quickly.
There were three requirements that I had in mind for this :
- No database to store data, I wanted to skip the additional performance hit.
- Content to be stored in markdown files so that it’s easy for me to edit and add new content.
- Themes/Templates to choose from, minimal effort on UI.
It didn’t take me much time to come across Jekyll. It’s simple, static and fast!
What’s Jekyll?
Jekyll is a Ruby gem, i.e. written in Ruby. It’s a simple, blog-aware and static-site generator that’s open source. Jekyll takes content from markdown templates and generates a static site from them which can be served on any web server. Jekyll is flexible and can be used with a combination of front-end frameworks. Jekyll also handles bundling and minification of .css files. And the best part, Jekyll has tons of ready to use themes that are free. Just some changes to be made in the markdown files for the content and you’re good to go!
What do you need to use Jekyll?
- Ruby development environment. (Instructions here)
- bundler and jekyll gems
gem install jekyll bundler
- Your favourite Jekyll theme ( Optional, if you do not want to use a theme )
- Your favourite text editor. ( I use
Atom)
How to use Jekyll to create your awesome website?
While we start with creating a static website, it is presumed that you have previously worked with HTML, CSS, Git. The theme I’ve chosen for this demo requires minimal code changes and content is controlled mostly by markdown files.
Create your project directory
$ mkdir static-site-demo
$ cd static-site-demo
Clone theme into your project directory
I have chosen the YAMT theme ( github link ) . If you plan on using the default template, you can just use jekyll new my-website and execute the next steps in that directory.
$ git clone https://github.com/PandaSekh/Jekyll-YAMT.git

$ cd Jekyll-YAMT
Install missing gems
$ bundle installStart serving your website on localhost
$ bundle exec jekyll serve

Configuration file: /../static-site-demo/Jekyll-YAMT/_config.yml
            Source: /../static-site-demo/Jekyll-YAMT
       Destination: /../static-site-demo/Jekyll-YAMT/_site
 Incremental build: disabled. Enable with --incremental
      Generating...
       Jekyll Feed: Generating feed for posts
                    done in 0.628 seconds.
 Auto-regeneration: enabled for '/../static-site-demo/Jekyll-YAMT'
    Server address: http://127.0.0.1:4000/
  Server running... press ctrl-c to stop.
You can now try accessing the website on your browser using the Server address specified http://127.0.0.1:4000/ and you’ll see the template load as is on your browser.
Now let’s try customising some of the content in the template to match our requirements.
Understanding the contents
In your project’s root directory, you should see a file called _config.yml. This file contains some general details such as title for the website. You can replace this content with the content you’d like such as your own contact details for example.
In the _data folder you should see these 3 files :
1. pages.yml – It defines what pages will be available for your website and the same will be visible in the header section of every page.
2. settings.yml – It is used to turn on/off various sections of your page such as subtitle, nav, featured-image, categories etc. You can also change your subtitle text here.
3. social.yml – It is used to specify what social buttons you’d like to have on your page. You can also specify links to your social profiles to these buttons.
In the _layouts folder you’ll see .html files files that define the content for each of the page. The data for the content is fetched from one of the .yml files we discussed above. It may also embed .html files from folder called _include.
The assets folder contains all the css and images for the template in the css and img folders respectively. You can add images here and make changes to the _config.yml file and the corresponding .html pages as required
To create a new post, create a new file in the _posts folder. All posts will have to be written in markdown. Markdown is simple and great way to create great-looking text files. Check out the Markdown Cheat Sheet to get started.
With all of this information at hand, let’s try to make some changes to the template.
I’ll modify this template to create a website for Tom’s Bistro, a Tom Haverford Restaurant.
Customising the template
I’m going to list down the changes I want to make and also mention the files I’m modifying to reflect these changes.
- Title and Description – Changed the value for title and description in
_config.yml.
title: Tom's Bistro
description: "Tom's Bistro"- Subtitle – Changed the value for subtitle.text in
_data/settings.yml
#Subtitle
subtitle:
  active: true
text: A Tom Haverford Restaurant- Change social pins – Change the links to social pins in
_data/social.ymlso that they link to Tom’s social profiles.
social:
  - {icon: 'twitter', type: "brand", link: 'https://twitter.com/tomsbistro'}
  - {icon: 'linkedin', type: "brand", link: 'https://www.linkedin.com/in/tom-haverford/'}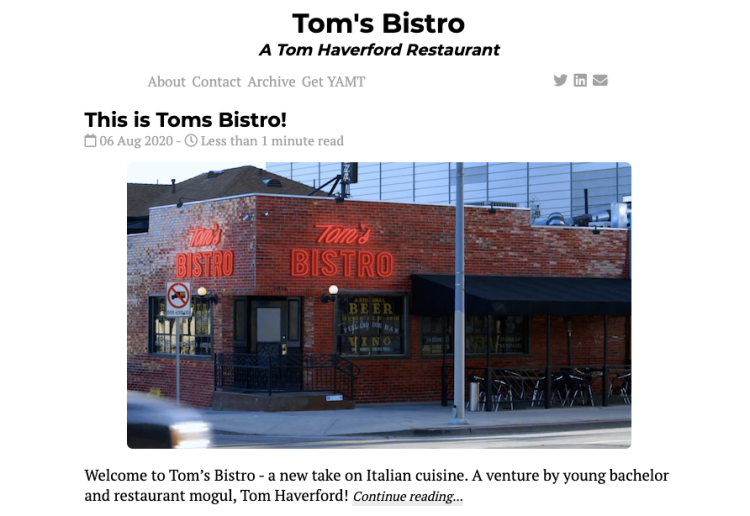
- {icon: 'envelope', type: "solid", link: 'tom@treatyoself.com'}- Created first post – Firstly download a feature image for the post. (I found a good image here ) Place the image at
assets/img/TomsBistro.png. Next, create a post at_posts/2020-08-06-this-is-tomsbistro.mdwith the below content.
---
title: This is Toms Bistro!
layout: post
categories: [Food, Italian, Cuisine]
image: /assets/img/TomsBistro.png
description: "Welcome to Tom's Bistro - a new take on Italian cuisine"
---

Welcome to Tom's Bistro - a new take on Italian cuisine. A venture by young bachelor and restaurant mogul, Tom Haverford!
I’m happy with the changes I’ve made for now and would like to have a look at the website. Run the server using bundle exec jekyll serve .
Ta Da! With just a few changes in some of the files you have your blog up and running. Keep adding posts to the _posts directory and new posts will keep popping on your home page. You can also modify the _data/pages.yml to add or remove the pages to your website. This will also modify the pages visible in the header section.
Thus, we saw how easy it is to have your static website up and running within a matter of minutes. You can of course customise the css and other components to have more control on the look and feel of the website, or you could just make changes in the .yml files to modify the content and get going.
I hope you found this interesting. Thank you for reading!
